Watercolor Techniques For Beginners: Click Here
Watercolor Techniques Reviews in Class:
Wet into Wet / Lifting Paint
Wet onto Dry / Glazing / Scumbling / Dry Brush
Charging / Diffusing/ Blooms
Salt Texture / Splatter Texture
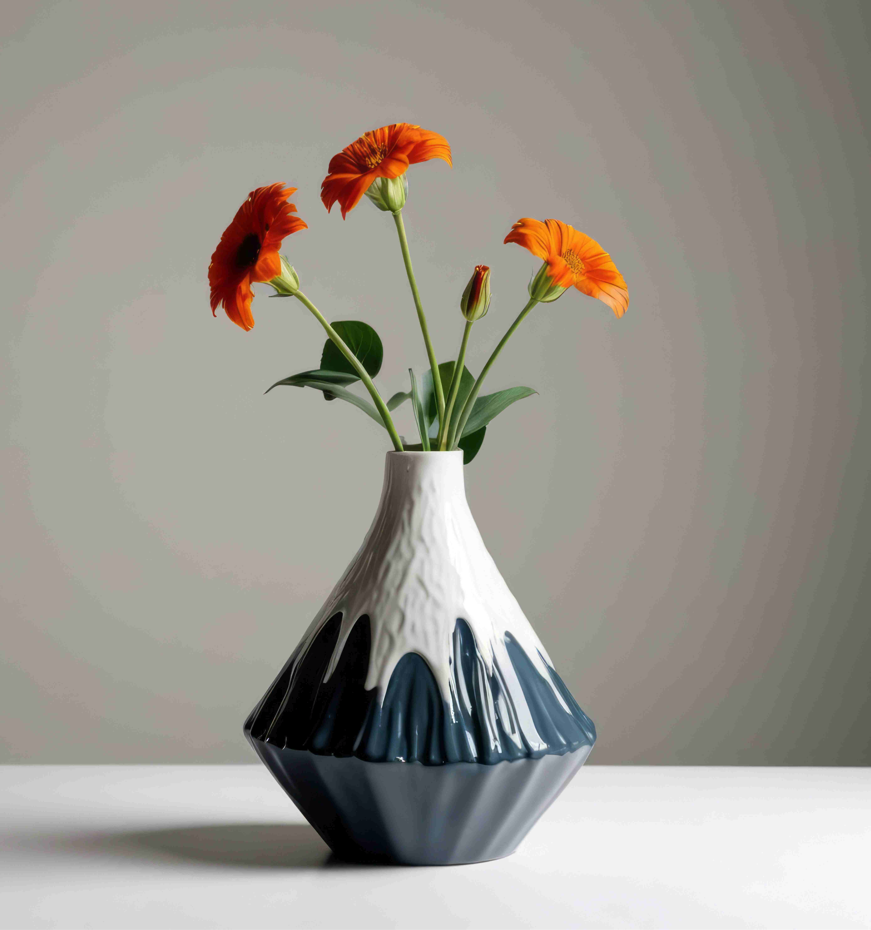
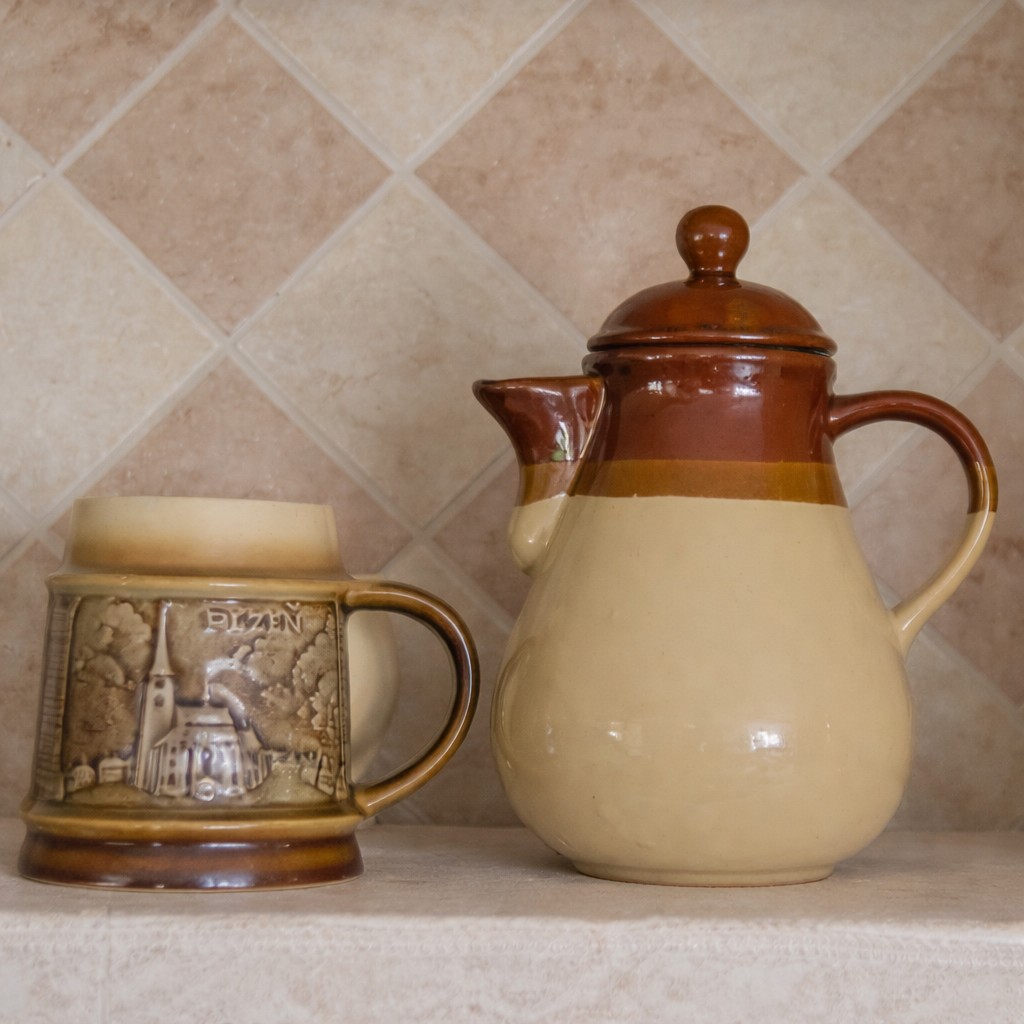
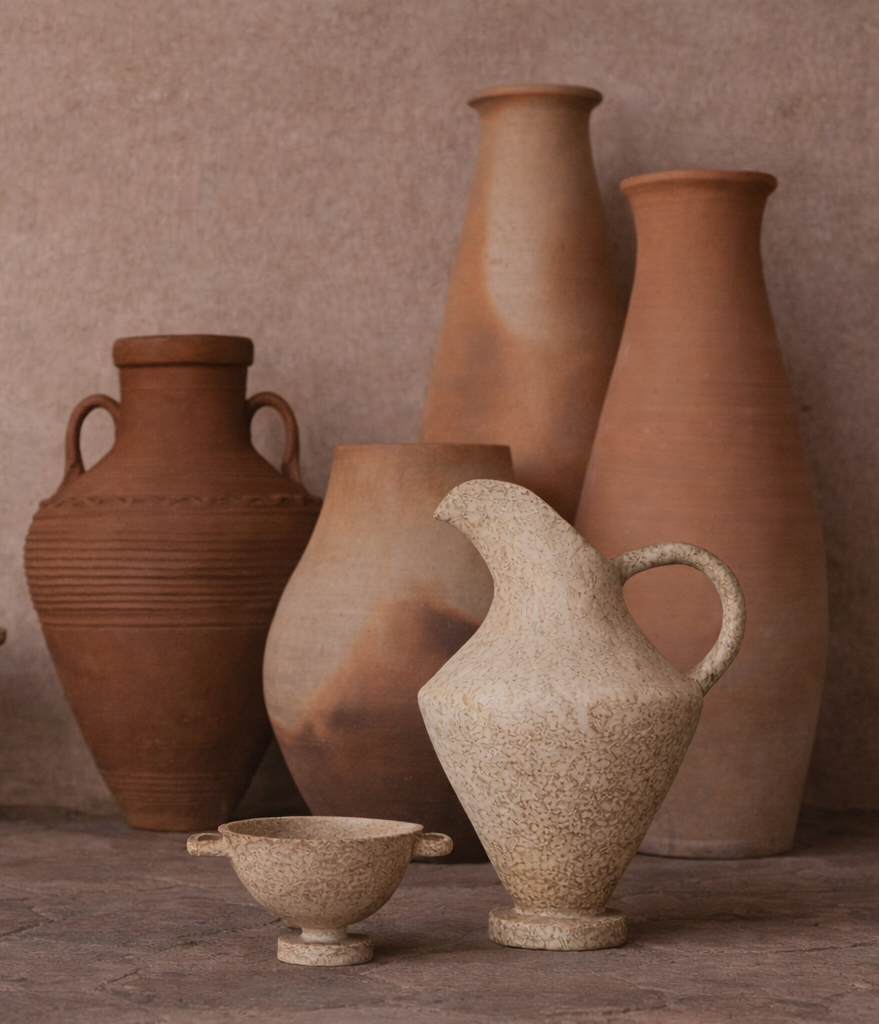
Homework Reference Photos

Photo Reference : BUTAFORYA COM
Watercolor Timing 101: The 5 Stages of Drying & How to Paint in Each
Have you ever watched a beautiful watercolor bloom across the page and wondered, “How do they control that?” Or maybe you’ve experienced the frustration of a perfect wash ruined by an untimely backrun. The secret that separates controlled elegance from chaotic puddles isn’t just talent but it is timing.
Watercolor is a dance with water and time. Today, we’re breaking down the five crucial stages of drying paper and giving you a simple, powerful exercise to practice this essential skill. Let’s unlock the magic of intentional painting.
The Five Stages of Drying: Your New Secret Language
Think of your paper as an active partner in the painting process. As it dries, its behavior changes dramatically. Learning to “read” the paper is the first step to total control.
1. Soaking Wet
The Look: Puddles on the surface. If you tilt your board, a bead of water will chase the edge.
The Behavior: The paper is fully saturated and can’t absorb more. Paint applied here will explode, drifting and feathering with wild, beautiful abandon. You have maximum time to blend and play.
Best For: Painting Wet into Wet for dreamy skies, soft backgrounds, and fluid washes without hard edges.
2. Shiny
The Look: A glossy sheen. No running puddles.
The Behavior: The paint will still bleed and bloom significantly, creating large, soft, feathery shapes. It’s perfect for intentional, controlled blooms.
Best For: Wet into Wet for soft edges and creating soft shapes like fur, foliage, or gradients.
3. Moist
The Look: The shine is fading. The paper feels cool and damp to the touch.
The Behavior: Paint will still bleed, but it won’t travel far. You get soft edges with more predictability than the “shiny” stage.
Best For: Wet into Wet with a lot of control and tiny blooms the very subtle edge changes
4. Damp
The Look: No shine at all. The paper feels barely damp and is cool or almost room temperature.
The Behavior: Adding a watery mix here will cause a backrun (or “cauliflower” effect) as the new water pushes the existing pigment aside.
Best For: Wet onto Damp/ almost dry to add defined details that have slightly soft, fuzzy edges
5. Dry
The Look & Feel: Completely dry, matte, and room temperature.
The Behavior: Any new paint sits on top as a separate layer. You get crisp, hard edges.
Best For: Final details, sharp lines, and glazing (adding transparent layers over dry paint).
Your Hands-On Practice:


The Five-Stages Timing Chart
Theory is great, but muscle memory is better.
This simple exercise is your fast track to internalizing timing.
The Exercise: Paint from Tutorial
Youtube Video: https://www.youtube.com/watch?v=OooiXQKZ-9o
Youtube Video : https://www.youtube.com/watch?v=OooiXQKZ-9o
Step 1: Practice Painting Pottery
Use reference photo and create drawing. You can also paint from life!
Step 2: Stage by Stage
Work on one pot at a time and allow each pot to reach the desired stage of wetness before you paint.
Step3: Stage by Stage
Practice painting wet into wet, wet onto dry, diffusion, splatter and even dry brush techniques. Mix your colors and get the most texture that you can. Wet the paper, drop colors in. Makes soft blends. Salt + Splatter: Adds fun texture. Wet onto Dry: Adding sharp details on dry paper. Glazing: Adding see-through shadows on top of dry paint.
Paint one pot at a time, let it dry between steps, and don’t overthink it. The water will do cool things for you.
Step 4: Add shadows
Practice using a glazing technique to add shadows. Gazing is Wet onto Dry paper. View this video for more tips . ( Click Here )